Bungie’s gripping first-person shooter, Destiny 2, provides a rich gaming experience that a lot of people across the globe love. The Beaver Error in Destiny 2 is one such frequent problem, but Destiny 2 is not impervious to technical issues like any other online game. In order to assist players in effortlessly returning to the game, we will examine the reasons behind this problem and provide detailed fixes in this guide.
Read More About How To Get Luminous Void Shader In Destiny 2 – Detailed Guide
How Do I Fix Beaver Error In Destiny 2
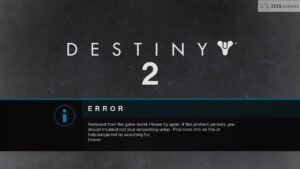
Players’ gameplay experience is disrupted by the error, which is mainly caused by issues with network settings. Here, we examine a number of approaches to diagnose and fix this error.
1. Update The IP Address
One quick fix for the Destiny 2 Beaver Error is to just change your IP address. Take these actions:
- Choose Run by right-clicking on the Start icon.
- Open Command Prompt as an administrator by typing ‘cmd’ into the Run dialog box and pressing Shift + Ctrl + Enter.
- Enter the following commands in the elevated Command Prompt:
- ipconfig /release
- ipconfig /renew
This procedure may fix connection problems and assist in updating your IP address.
2. Change The DNS Settings
Changing DNS settings is another way to fix the Beaver Error in Destiny 2. Here’s a detailed how-to:
- Press the Windows and I keys to open Windows Settings, then choose Network & Internet.
- Go to Status and choose Adjust adapter settings.
- Choose Properties by doing a right-click on your network.
- Click Properties after selecting Internet Protocol Version 4 (TCP/IPv4) in the presented box.
- Set the Preferred DNS server to 8.8.8.8 and the Alternate DNS server to 8.8.4.4 by selecting ‘Use the following DNS server addresses’.
- To save the changes, click OK.
3. Reset Your Router To Default
One useful solution is to reset the router to its factory settings. Make sure your router is restarted before doing this. Take these actions:
- Make sure the router is turned on.
- Using a paper clip, press and hold the Reset button on the rear of your router for approximately 10 seconds.
- Release the Reset button and watch for your router to reset and turn back on once the power light flashes.
4. Switch To Another Network
- To find out whether the Destiny 2 Beaver Error still occurs, try connecting to another network, if at all feasible. Think about using the hotspot on your smartphone or moving from a wireless to a cable connection.
5. Enable The Beta Version Of Steam
There is a workaround for the Destiny 2 Beaver Error that involves using the Steam Beta version. Take these actions:
- Start your PC’s Steam client.
- Select Settings by clicking the Steam option located in the upper-left corner.
- Click on the CHANGE button after selecting Account.
- Click OK after choosing Steam Beta Update from the drop-down option.
- To see if the error has been fixed, restart Steam.
Conclusion
In summary, gamers may find the Beaver Error In Destiny 2 to be a difficult challenge, but it is surmountable with the appropriate troubleshooting techniques. Players may fix connection problems and resume enjoying Destiny 2 with the help of these solutions, which include changing networks, unlocking the Steam Beta version, resetting the router, renewing the IP address, and modifying DNS settings.
Please post a comment below if you run into any ongoing issues or have any other tips for fixing the Destiny 2 Beaver Error. Recall that a seamless gaming experience is just a few clicks away!
Next:
Share this content: